Salmon fishing enthusiasts understand the allure and effectiveness of using cured salmon eggs as bait. Whether you’re targeting Chinook Salmon in the tidewater or Steelhead in the rivers, mastering the art of curing salmon eggs can significantly enhance your fishing experience.
Here’s a comprehensive guide, along with an advanced technique for crafting extra sweet salmon eggs, to take your fishing game to the next level:
1. Preparation and Care for Your Catch:
Proper handling of your catch is essential to ensure the freshness and quality of the salmon eggs. Follow these steps to prepare and care for your catch effectively:
Immediate Bleeding: Upon landing the salmon, prioritize bleeding it as soon as possible. This step is crucial for preserving the freshness of the eggs. Using a sharp knife, sever the main artery located just behind the gills to allow the blood to drain out quickly. Bleeding the salmon promptly helps prevent blood from tainting the eggs and ensures they maintain their natural color and flavor.
Gentle Handling: Handle the salmon with care to avoid causing unnecessary stress or injury. Use a landing net or gripper tool to safely secure the fish without damaging its delicate flesh or eggs. Avoid dropping or mishandling the salmon to prevent bruising or rupturing the egg skeins.
Cooling the Fish: After bleeding, keep the salmon cool to slow down the enzymatic processes that can lead to spoilage. Place the fish on a bed of ice or in a cooler filled with ice packs to maintain a consistently cold temperature. Avoid exposing the salmon to direct sunlight or warm temperatures, as this can accelerate bacterial growth and compromise the quality of the meat and roe.
Protecting the Eggs: While cooling the fish, take care to shield the exposed egg skeins from direct contact with the ice. Excessive contact with ice can cause the eggs to freeze and become damaged. Instead, place a layer of damp cloth or paper towels over the eggs to provide insulation and prevent them from drying out.
Transportation: If you’re transporting the salmon over a long distance, ensure proper insulation to maintain the desired temperature. Use insulated coolers or containers designed for transporting perishable items. Monitor the temperature regularly and replenish the ice as needed to keep the fish and eggs chilled during transit.
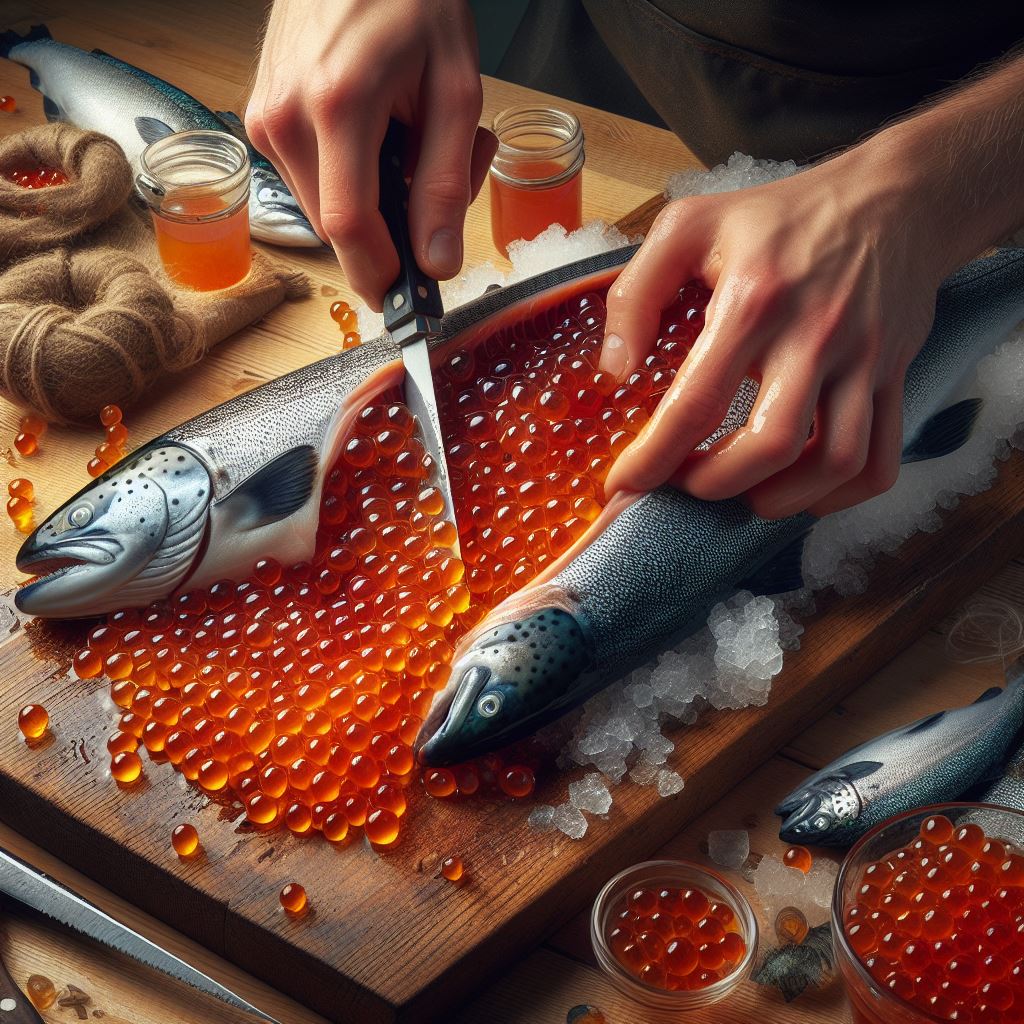
2. Removing the Salmon Roe:
Properly extracting the salmon roe is a delicate process that requires precision and attention to detail. Follow these steps to remove the egg skeins without causing damage:
Gentle Handling: Handle the salmon with care to prevent any unnecessary trauma to the fish or its roe. Using a sharp fillet knife, make shallow incisions along the belly of the salmon, taking care to avoid puncturing the egg skeins. Work slowly and methodically to ensure clean cuts and minimize the risk of damaging the delicate eggs.
Butterflying the Skeins: Once the egg skeins are exposed, carefully butterfly them by gently splitting them open along the incisions. This technique allows you to access the individual eggs contained within the membrane, preparing them for the curing process. Take care not to tear or rupture the membrane, as this can lead to egg loss and reduce the overall quality of the bait.
Removing Blood Veins: Inspect the egg skeins for any visible blood veins or excess blood that may affect the quality of the cured eggs. Using a pair of tweezers or a small knife, carefully remove any blood vessels or clots from the surface of the skeins. Thoroughly cleaning the roe ensures that the final product is free from any undesirable impurities and maintains its natural appearance and flavor.
Patting Dry: After removing any blood veins or excess moisture, gently pat the egg skeins dry with a clean paper towel or cloth. This step helps to remove any remaining blood or liquid from the surface of the roe, ensuring that the eggs are clean and ready for the curing process. Take care not to apply too much pressure, as this can cause the eggs to rupture or become damaged.
3. Preparing the Roe for Curing:

Achieving top-quality bait starts with thorough preparation of the salmon roe. Follow these steps to ensure your eggs are primed for the curing process:
Removing Impurities: Before proceeding with curing, meticulously inspect the egg skeins for any blood veins or excess blood. Using a pair of tweezers or a small knife, carefully remove any visible impurities from the surface of the roe. This step is crucial for producing clean, high-quality bait that will attract fish effectively.
Butterflying the Skein: To expose the eggs fully and facilitate the curing process, butterfly the egg skein by gently splitting it open along the incisions made during the removal process. Take care to spread the skein evenly to ensure uniform access to the eggs contained within the membrane. This step allows the curing mixture to penetrate the roe evenly, resulting in consistent bait quality.
Patting Dry: After addressing any impurities, gently pat the egg skein dry with a clean paper towel or cloth. This helps to remove any remaining blood or moisture from the surface of the roe, ensuring optimal curing results. Proper drying also prevents the eggs from clumping together during the curing process, promoting even distribution of the curing mixture.
By meticulously preparing the salmon roe before curing, you set the stage for creating bait of the highest caliber.
4. Applying the Salmon Egg Cure:
Once you have properly prepared the salmon roe, it’s time to apply the salmon egg cure. Here’s how to do it effectively:
Choosing the Right Egg Cure Product: Selecting a high-quality egg cure product is essential for optimal results. For extra sweet salmon eggs, consider using a mixture of Pautzke’s Pink and Red Fire Cure along with sugar and borax. This combination is known to attract strikes from even the most selective fish.
Mixing the Cure: In a suitable container, combine one cup each of Red Fire Cure and Pink Fire Cure, along with half a cup of sugar and half a cup of borax. Thoroughly mix the ingredients to ensure even distribution.
Even Application: Sprinkle the cure mixture evenly over the prepared salmon eggs. It’s crucial to achieve thorough coverage to maximize the effectiveness of the bait. Avoid clumping or uneven distribution of the cure.
Gentle Mixing: Carefully mix the cure into the eggs, ensuring not to crush or damage them. Gentle mixing helps to coat each egg uniformly with the curing mixture, enhancing its effectiveness.
Curing Duration: Allow the eggs to absorb the cure mixture fully. The curing process involves drawing out liquids from the eggs while preserving the bait. Depending on your preference and fishing conditions, let the eggs cure for at least two to three days.
Periodic Turning: During the curing process, periodically turn the bags containing the eggs to ensure even distribution of the cure. This helps to promote uniform absorption and enhances the overall quality of the bait.
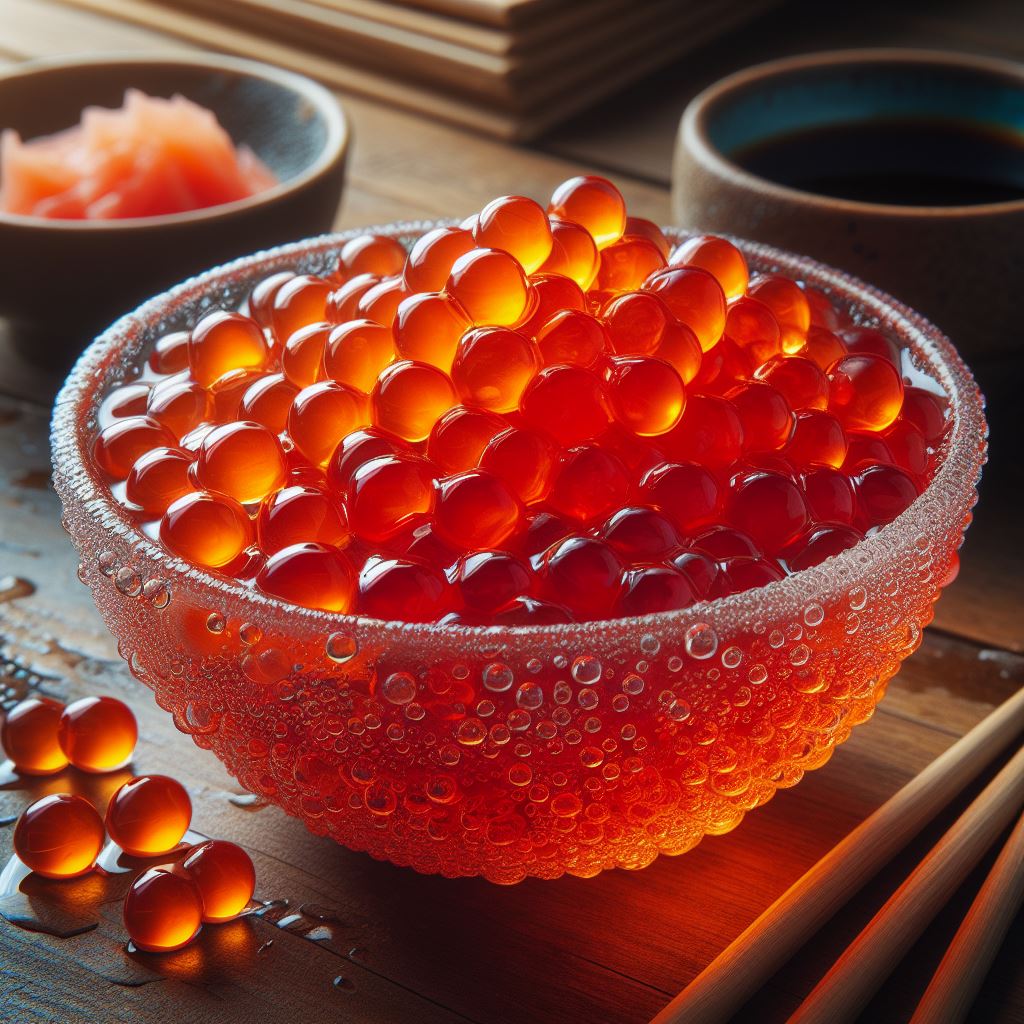
Observing Changes: As the curing progresses, you’ll notice the eggs beginning to swell and become plump. This indicates that the eggs are absorbing the cure mixture effectively and are nearing readiness for the next stage.
For detailed instructions on how to cure salmon eggs with borax, explore our comprehensive guide.
5. The Egg Curing Process:
Mastering the egg curing process is essential to produce bait that’s both effective and long-lasting. Follow these steps to ensure successful curing of your salmon eggs:
Allowing Absorption: Once the egg skeins are properly prepared, it’s time to apply the curing mixture. Sprinkle the chosen egg cure product evenly over the exposed eggs, ensuring thorough coverage. The curing mixture contains ingredients that not only enhance the flavor and color of the bait but also preserve it for extended periods.
Initiating Curing: After applying the cure mixture, allow the eggs to absorb it fully. Place the treated egg skeins in a suitable container, ensuring they are arranged in a single layer to promote even absorption. The curing process begins as the eggs start to draw in the liquids from the curing mixture, resulting in plumper and more flavorful bait.
Juicing Up: As the curing progresses, you’ll notice the eggs beginning to “juice up,” expelling excess liquid. This is a natural part of the curing process and indicates that the eggs are absorbing the cure effectively. Periodically turning the bags containing the egg skeins ensures that the curing mixture is distributed evenly, maximizing its effectiveness.
Duration of Curing: The optimal duration for curing depends on various factors, including the type of cure used to Cure Salmon Eggs, ambient temperature, and personal preferences. Generally, allowing the eggs to cure for at least two to three days yields excellent results. During this time, the eggs continue to absorb the curing mixture, enhancing their flavor, color, and durability.
Final Inspection: After the curing period is complete, inspect the cured salmon eggs for readiness. They should appear plump, firm, and uniformly coated with the curing mixture. If necessary, adjust the curing duration to achieve the desired texture and flavor. Properly cured eggs are ready to be dried and stored for future use or immediately employed as bait.
6. Finalizing the Cured Salmon Roe:
After completing the curing process, it’s essential to finalize the preparation of the salmon eggs to maximize their effectiveness as bait. Follow these steps to ensure the eggs are properly dried and stored:
Assessing Readiness: Once the eggs have absorbed the curing mixture and achieved a plump, rounded appearance, they are ready for the finalization stage. This indicates that the eggs have undergone sufficient curing and are primed for drying.
Initiating Drying: Drying the cured salmon eggs is crucial for toughening them and extending their lifespan in the water. The duration of the drying process depends on your fishing preferences and the desired consistency of the bait. For optimal results, consider drying the eggs for 8 to 24 hours.
Choosing a Drying Method: There are various methods for drying cured salmon eggs, including air-drying and refrigeration. Air-drying involves spreading the eggs out in a single layer on a clean surface, such as a tray or newspaper. Ensure proper ventilation to facilitate drying.
Ensuring Even Drying: To promote even drying, periodically turn the eggs during the drying process. This helps prevent moisture buildup and ensures that all sides of the eggs are exposed to air, resulting in uniform drying and consistency.
Monitoring Progress: Keep a close eye on the eggs during the drying period to prevent over-drying. Check for signs of readiness, such as a slightly tacky surface and a firm texture. Avoid overdrying the eggs, as this can lead to a tough, unpalatable consistency.
Storage Options: Once the eggs are adequately dried, store them in suitable containers for future use. Refrigeration or freezing are both viable options for preserving the cured salmon eggs. If refrigerating, use airtight containers to prevent moisture absorption and maintain freshness. For long-term storage, consider freezing the eggs in freezer-safe bags or containers.
Labeling and Dating: To ensure proper organization and freshness, label the containers of cured salmon eggs with the date of preparation. This allows you to track the shelf life of the bait and prioritize the use of older batches before newer ones.
7. Advanced Method for Curing Salmon Eggs:
For anglers seeking to elevate their bait game and entice even the most hesitant fish, consider incorporating this advanced technique for Curing Salmon Eggs.
Follow these steps to create brilliant, bright red bait that can attract strikes with irresistible sweetness:
Ingredients Needed: To begin, gather the following ingredients:
- 1 cup of Red Fire Cure
- 1 cup of Pink Fire Cure
- 1/2 cup of sugar
- 1/2 cup of borax
Preparation Process:
In a mixing bowl, combine the Red Fire Cure, Pink Fire Cure, sugar, and borax. Ensure thorough mixing to create a uniform blend of ingredients.
Adjust the quantities according to personal preference, keeping in mind that a higher sugar content will result in sweeter eggs.
Application Technique:
Once the mixture is prepared, sprinkle it evenly over the salmon eggs, ensuring comprehensive coverage. The combination of cures, sugar, and borax will infuse the eggs with sweetness and vibrant color.
Enhancing Curing Effectiveness:
To optimize the effectiveness of the curing process, consider cutting the half skeins into smaller pieces before applying the mixture. This allows for more even distribution of the cure and enhances its penetration into the eggs.
Curing Duration:
Allow the eggs to cure for the recommended duration, typically two to three days, to ensure optimal absorption of the sweetening ingredients. During this time, periodically turn the bags to facilitate even distribution of the cure.
Finalization and Storage:
Once the eggs have completed the curing process and achieved the desired plumpness and color, they are ready for finalization.
Dry the cured salmon eggs for 8 to 24 hours to toughen them and prolong their lifespan in the water.
Store the finished bait in airtight containers in the refrigerator or freezer to maintain freshness until ready for use.
FAQ Section: Curing Salmon Eggs for Fishing
How long do salmon eggs last before curing?
Salmon eggs should ideally be cured as soon as possible after harvesting them from the fish. However, if immediate curing isn’t possible, they can be kept fresh for a short period. To preserve their freshness, store the eggs in a cool environment, preferably on ice, for up to 24 hours after harvesting. It’s essential to minimize exposure to air and keep the eggs as blood-free as possible during this time.
How do you keep salmon eggs fresh?
Keeping salmon eggs fresh is crucial for producing high-quality bait. After harvesting the eggs from the salmon, ensure they are blood-free by carefully removing any blood veins and excess blood. Store the eggs in a sealed container or plastic bag to prevent exposure to air and keep them cool, preferably on ice, until you’re ready to begin the curing process. Proper handling and refrigeration help maintain the freshness of the eggs before curing.
How do you get eggs from salmon?
Harvesting eggs from salmon requires careful handling and precise techniques to ensure the quality of the bait. Begin by bleeding the salmon immediately after catching it to minimize blood contamination in the eggs. Using a fillet knife, make a shallow incision from the anal vent to the throat, being careful not to cut through the egg skeins. Remove the egg skeins by hand, ensuring they are intact and free from blood or other contaminants.
How do you cure salmon eggs with borax, salt, and sugar?
Curing salmon eggs with a mixture of borax, salt, and sugar is a common method to preserve and enhance their quality for fishing bait. Here’s a basic recipe for curing salmon eggs:
- Start by preparing the salmon egg skeins, ensuring they are blood-free and properly exposed.
- Mix together borax, salt, and sugar in a ratio that suits your preference. You can also add other ingredients like dye for coloring.
- Lay out the egg skeins and sprinkle the cure mixture evenly over them until lightly covered.
- Massage the cure into the skeins to ensure thorough coverage, avoiding using too little or too much.
- Allow the eggs to cure for several hours, during which the cure will draw out liquids from the eggs and then be reabsorbed, preserving and enhancing their quality.
- Depending on your fishing preferences, you can finalize the cured salmon eggs by leaving them in their juices for a wet cure or air drying them for a tougher consistency, optionally rolling them in borax for added durability.
Comprehensive Guide: Curing Salmon Eggs with Salt and Sugar
In conclusion, mastering the art of curing salmon eggs is essential for any angler looking to elevate their fishing game. By following the detailed steps outlined in this guide, you can prepare top-quality bait that entices even the most discerning fish.
Whether you’re a novice or seasoned angler, the techniques shared here will help you achieve success on the water. Experiment with different curing methods and ingredients to find the perfect recipe for your fishing needs. With patience, practice, and attention to detail, you’ll unlock the secrets to expertly curing salmon eggs and enjoy bountiful catches for years to come. Happy fishing and tight lines!